
This post may contain affiliate links. Read my Disclosure page.

Over the past few years, I’ve received a lot of requests for smaller variations of normally large desserts. That's what prompted the small-batch baking recipes I have on this blog, as well as my second cookbook, Simple Small-Batch Baking, which is where this 6-inch chocolate peppermint layer cake comes from!
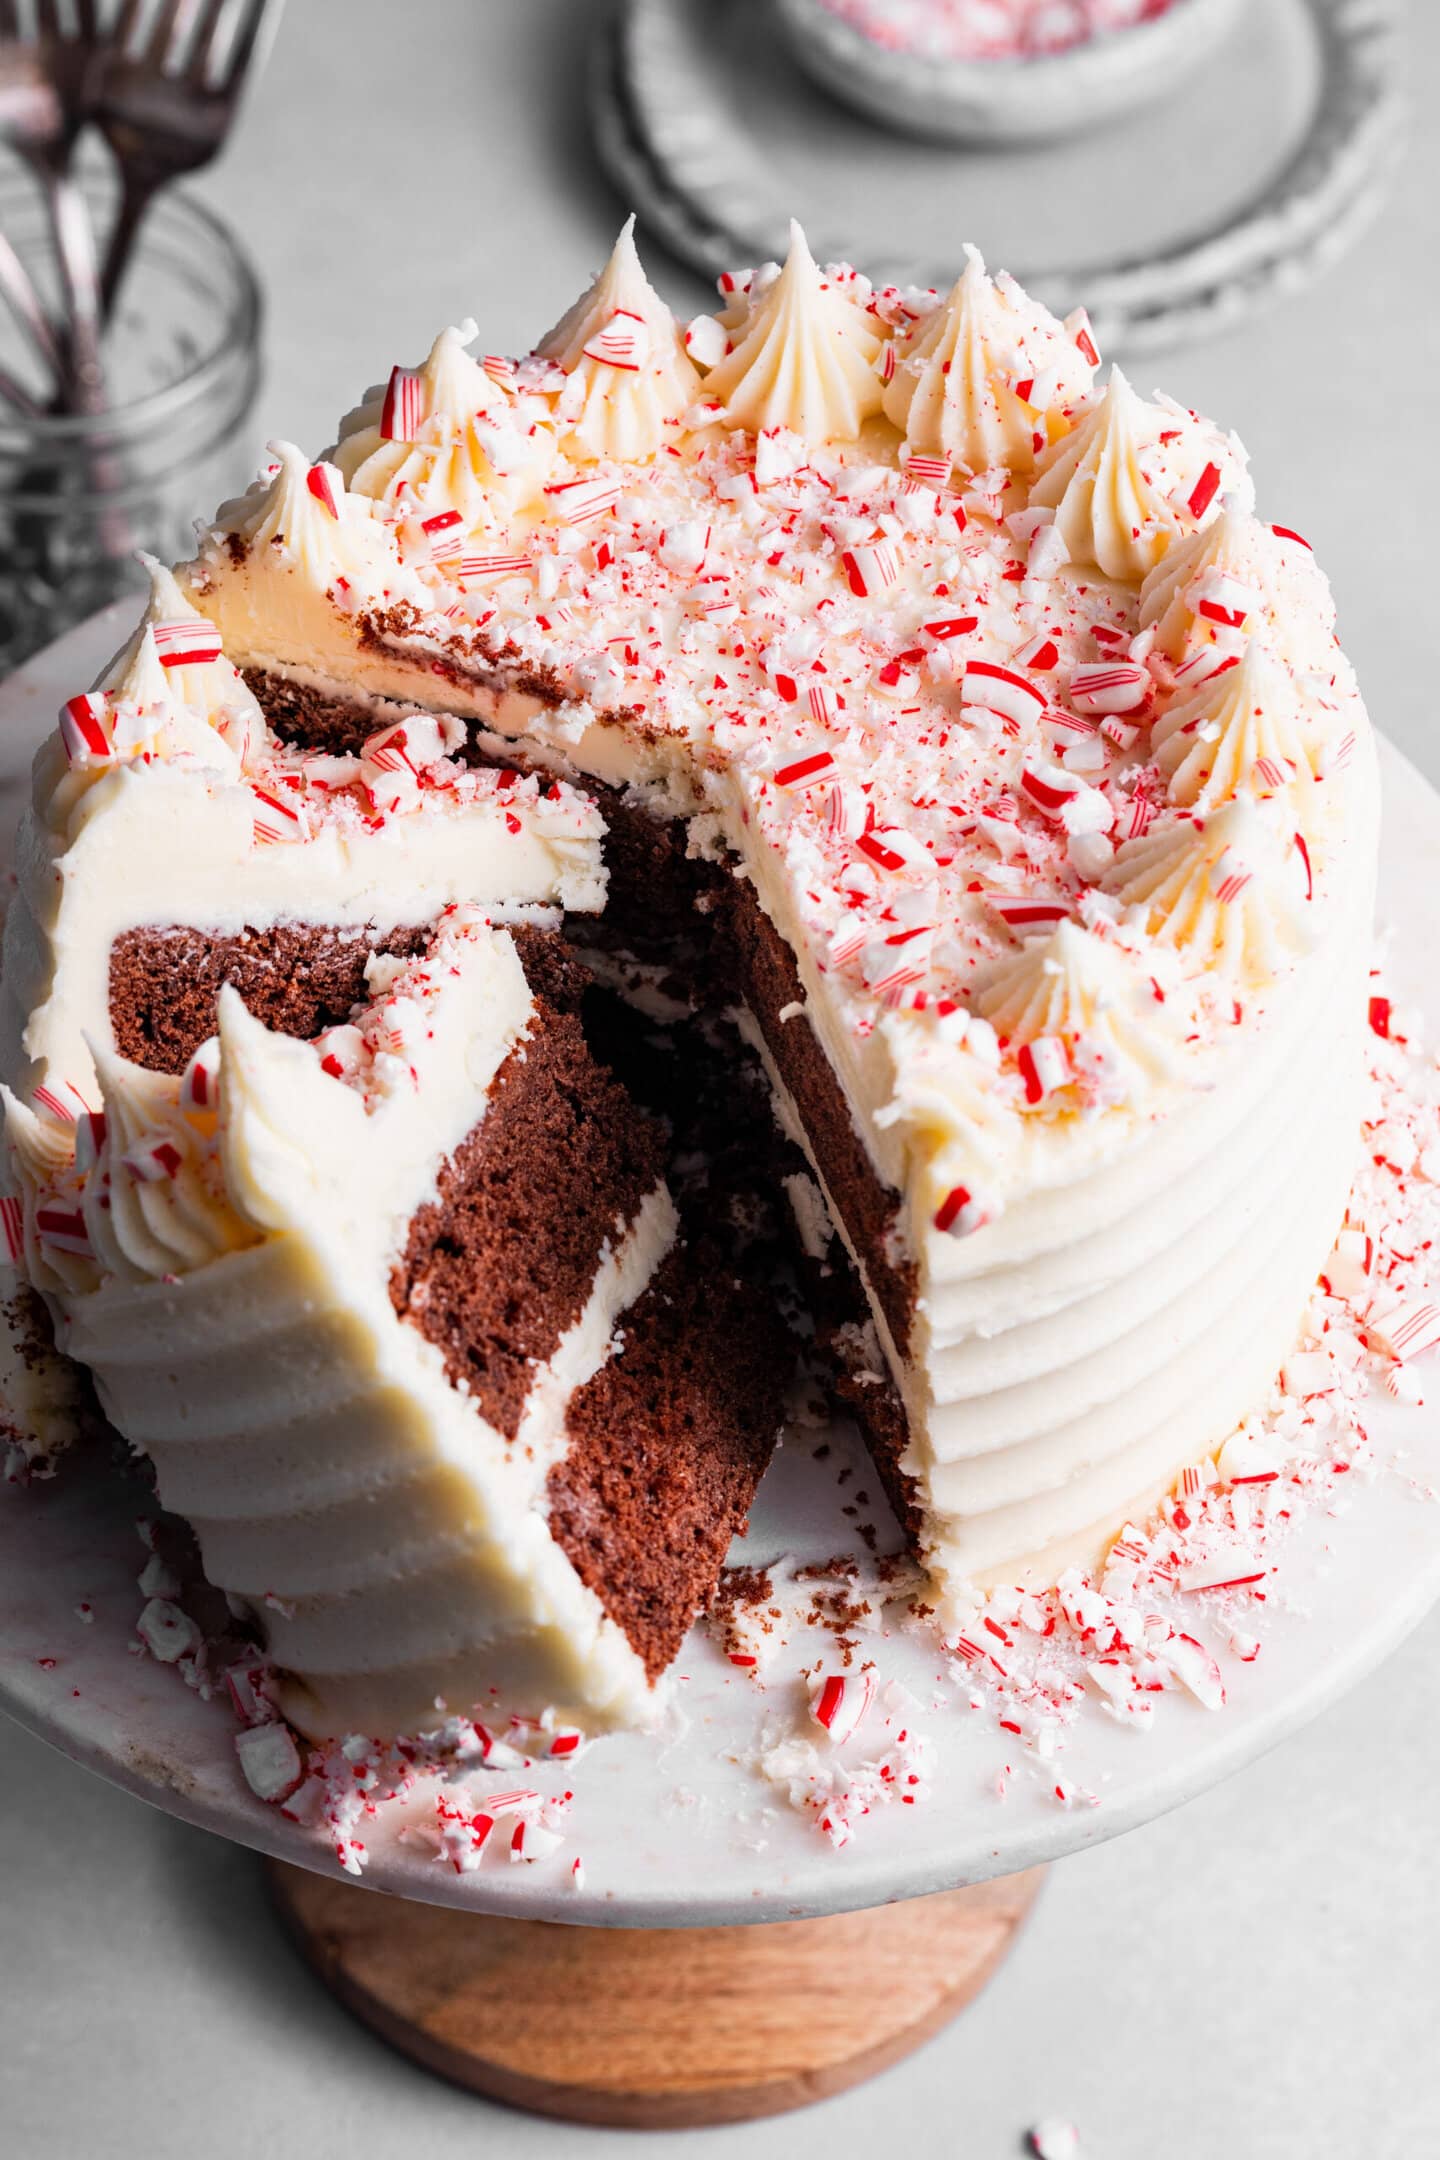
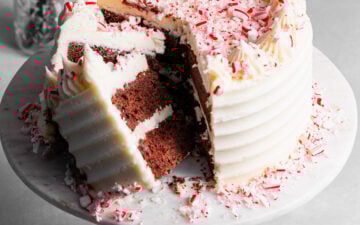
This 6-inch layer cake recipe is ideal for small holiday celebrations or anytime you want/need a small cake! It’s basically peppermint bark in cake form... so, like, it’s perfect. It has moist and fluffy chocolate cake layers with a hint of peppermint and is topped with a creamy and decadent white chocolate peppermint frosting that you'll want to lick off of a spoon. Need I say more?!
If white chocolate isn't your thing, you could totally switch up the frosting and top this cake with a tangy cream cheese frosting instead. I'd recommend doubling the recipe and adding 1/2 teaspoon of peppermint extract so the chocolate peppermint flavor still shines through!
And if you love the chocolate-peppermint combo, you must try these chocolate peppermint macarons, these peppermint patty brownies, and these frosted peppermint brownie cookies.
Ingredients and Substitutions
- Butter: Start with cool, room-temperature butter for both the cake batter and the frosting. The ideal temperature is 67°F (19°C); you should be able to leave an indent of your finger rather than your finger sinking all the way through.
- Granulated sugar: To sweeten our cake batter.
- Eggs: Only two large eggs are needed in this recipe to create the perfect texture.
- Vanilla: Heilala Vanilla is my go-to.
- Peppermint extract: This is a chocolate peppermint layer cake, after all...
- All-purpose flour: Just 1 cup total!
- Cocoa powder: This recipe can use unsweetened natural or Dutch-processed.
- Salt: A necessary flavor enhancer.
- Baking powder & baking soda: To help the cake rise.
- Buttermilk: Buttermilk brings a pleasant tang to the cake and helps keep the cake tender by inhibiting gluten formation. If you don't have buttermilk, use 1/2 cup of milk with 1/2 tablespoon of vinegar (distilled white vinegar or apple cider vinegar).
- White chocolate: Make sure you grab a high-quality white chocolate bar; avoid white chocolate chips, as they won't melt down properly.
- Powdered sugar: For the buttercream frosting.
The Best Cake Pan to Use
This is my favorite 6-inch cake pan. They're light in color, which helps distribute heat evenly. And they're extremely high quality; a few commercial bakeries here in New York City use them exclusively!

How to Prep 6-Inch Cake Pans
Smaller cakes can be more difficult to release from the baking pan neatly. Here’s my cake pan prep so that your 6-inch cake plops right out:
- Make a parchment paper round. Trace the bottom of the cake pan on a large piece of parchment paper and then cut the circle out. (Use the bottom as some cake pans can be tapered or have a thicker rim around the top, which will leave you with a parchment round that's too large.) If you make cakes often, these pre-cut parchment rounds are amazing.
- Very lightly grease the cake pan. I swear by Baker's Joy, as there's flour in the spray.
- Place the parchment round inside and grease the parchment round too. This ensures a super non-stick environment for your cake.
How to Make a 6-Inch Chocolate Peppermint Cake
- Bring all of your baking ingredients to room temperature and preheat the oven to 350°F (180°C) and prep two 6-inch round cake pans with parchment paper and baking spray.
- In a large bowl using a hand mixer, cream the butter and sugar. Add the eggs, vanilla, and peppermint extract and beat until combined.
- Mix the flour, cocoa powder, baking powder, baking soda, and salt in a medium bowl and whisk until combined. With the mixer on low speed, add the dry ingredients in two to three additions, alternating with the buttermilk.
- Divide the batter evenly between the two cake pans and bake for 25 minutes.
- The cake is done when the top of the cake bounces back when gently pressed and when a toothpick inserted into the center comes out clean or with a few moist crumbs.

How to Make White Chocolate Peppermint Buttercream
- Melt the white chocolate using a microwave or the double boiler method, then set aside (see recipe card for detailed instructions).
- Add the 1 cup butter, 2¼ cups powdered sugar, ¼ cup heavy cream, vanilla, salt, and peppermint extract to the bowl of a stand mixer fitted with the paddle attachment.
- Beat at medium speed for two to three minutes until it is smooth.
- Switch to low speed and carefully pour in the cooled melted white chocolate. Beat for one more minute until smooth and fluffy.

Assembling, Frosting, and Decorating a 6-Inch Cake
Decorating this 6-inch cake is just like decorating a larger cake, but the smaller size is definitely easier to work with.
- If the cake tops are not flat, level them off with a long serrated knife.
- Place one cake layer on your cake stand and evenly cover the top with a large dollop of frosting.
- Top with the second layer, placing it upside down (so the flat bottom of the cake is on top), and spread a thin layer of the frosting all over the top and sides for your crumb coat.
- Smooth the frosting with an offset spatula and bench scraper and chill the cake until the frosting has hardened slightly,10 to 20 minutes.
- Frost the rest of the cake by spreading the rest of the buttercream over the crumb coat and smoothing it with an offset spatula and bench scraper.
Note: This chocolate peppermint cake can be made ahead and decorated later if you want! Once the cake is baked and completely cooled, wrap it tightly in plastic wrap followed by aluminum foil. You can then store it in the freezer for up to 3 months. When ready to assemble, unwrap the cake layers and get to work frosting and decorating. It’s so much easier if the cake is cold, as there are fewer loose crumbs (meaning I can usually skip the crumb coat)!
Helpful Cake Decorating Tools:
- Bench Scraper: Running a bench scraper around the cake's sides helps smooth the frosting. You can also use a patterned cake comb, which makes for an easy yet impressive finish.
- Cake Turntable: A cake turntable makes it insanely easy to smooth the sides of a cake with a bench scraper.
- Small Offset Icing Spatula: Use this to spread the frosting on the sides and top of the cake.
- Piping Bags: If you want to go all out on decorating, pick up some piping bags and piping tips!

Note: I post my recipes in grams as it’s the most accurate way to bake, and it’s how I develop them. Cups are not only inaccurate, but they vary in volume worldwide! If you look at the recipe card underneath the ingredients list, however, you can click “US Customary,” and it’ll convert to volume measures!
Remember to tag me @mikebakesnyc on Instagram and leave a rating + review below if you make this 6-Inch Chocolate Peppermint Layer Cake!
6-Inch Chocolate Peppermint Layer Cake
Ingredients
For the Chocolate Peppermint Cake:
- 113 g unsalted butter softened
- 150 g granulated sugar
- 2 large eggs (~100g), room temperature
- 1 teaspoon vanilla extract
- ½ teaspoon peppermint extract
- 120 g all-purpose flour
- 30 g unsweetened natural or Dutch process cocoa powder
- ¼ teaspoon baking powder
- ¼ teaspoon baking soda
- ½ teaspoon fine sea salt
- 120 g buttermilk room temperature
For the White Chocolate Peppermint Buttercream
- 170 g white chocolate finely chopped
- 227 g unsalted butter softened
- 270 g powdered sugar
- 60 g heavy cream room temperature
- 1 teaspoon vanilla extract
- ½ teaspoon peppermint extract
- ⅛ teaspoon fine sea salt
- Garnish: crushed peppermint candy
Instructions
To Make the Chocolate Peppermint Cake:
- Preheat the oven to 350°F (180°C). Grease two 6-inch (15-cm) cake pans, line them with parchment paper, then grease the parchment paper. Parchment paper helps the cakes to release from the pan seamlessly.
- In a large bowl using a handheld mixer, beat the butter on high-speed until it’s smooth and creamy, about 1 minute. Add the sugar and beat on high speed for 2 minutes, or until it’s creamed together. Scrape down the sides and up the bottom of the bowl with a rubber spatula as needed. Add the eggs, vanilla, and peppermint extract, and beat until combined.
- In a medium bowl, combine the flour, cocoa powder, baking powder, baking soda, and salt, and whisk until combined. With the mixer on low-speed, add the dry ingredients in two to three additions, alternating with the buttermilk. The batter will be thick.
- Pour the batter into the prepared pans and smooth out the top. Note: this recipe makes around 23 ounces (645 g) of batter; pour 11.5 ounces (323 g) into each cake pan. Bake the cakes for 25 to 27 minutes, or until the top of the cake bounces back when gently pressed and a toothpick inserted into the center of the cake comes out with a few crumbs attached. Cool the cakes completely in the pans on a wire rack before frosting them.
To Make the White Chocolate Peppermint Buttercream:
- Begin by melting the chocolate. Place it in a heat-safe bowl and set it over a pan of gently simmering water to create a double boiler; stir until the chocolate is completely smooth and melted. Alternatively, melt the chocolate in the microwave, heating it in 30-second intervals and mixing thoroughly between each interval. Once the chocolate is fully melted, remove the bowl from the heat and set it aside to cool the chocolate slightly, about 10 minutes.
- In the bowl of a stand mixer fitted with the paddle attachment, or in a large bowl using a handheld mixer, beat the butter on high speed until it’s completely smooth and creamy, 2 to 3 minutes. Switch to medium-high speed and beat in the powdered sugar, cream, vanilla, peppermint extract, and salt. Once combined, switch to low speed and slowly pour the slightly cooled white chocolate in, with the mixer running. Beat until the ingredients are smooth and fully combined.
- Using a large, serrated knife, slice a thin layer off the tops of the cakes to create a flat surface, if needed. Place one cake layer on your cake stand or serving plate, and evenly cover the top with a large dollop of frosting. Top with the second layer, placing it upside down (so the flat bottom of the cake is on top), and spread a thin layer of the frosting all over the top and sides for your crumb coat. Smooth the frosting with an offset spatula and bench scraper and chill the cake until the frosting has hardened slightly,10 to 20 minutes.
- Pipe on the rest of the buttercream over the crumb coat, and smooth it with an offset spatula and bench scraper. Pipe dollops of leftover buttercream around the edge of the cake, and sprinkle it with the crushed peppermints.
- Store the cake in an airtight container in the fridge for up to 4 days.
Pam
I did make this luscious cake! And, despite it not being nearly as beautiful as Mike’s, the cake was delicious and the perfect size too. I always love Mike’s recipes, and I especially enjoy his small batch offerings.
Mike Johnson
Thank you so much, Pam! Glad to hear you liked the cake; it's one of my favorites for this time of year!